How to create synth sounds of a particular color
This part will teach you how to give a synth sound a “color”, which means when the part that uses that synth is played with the rest of the track it will transfer that particular color to the brain. For this, we will use the 3 channel oscillator plugin built in FL Studio, called 3x Osc. This will also require a little color theory, which is very easy to understand through the aid of an image processing application such as the free and open source GIMP. So, you need to install a copy of GIMP, if you don’t already have one. If you open GIMP and select a color from a photo with the color picker or from the preset swatches, you will notice you can change it by tweaking the RGB or CMYK sliders. RGB stands for the Red, Green and Blue values that compose a color and CMYK stands for Cyan, Magenta, Yellow and Black, used for printed images. Electronic synth sounds are in RBG, so we need to note down the RGB values of the color we want to create, before adjusting the corresponding parameters on the 3x Osc plugin. Let’s suppose we want to create a green hue. Click on the foreground color selector in GIMP. A window titled “Change foreground color” will open. You can now create your color using the RGB sliders or use the eyedropper tool beside the HTML notation field to pick it from an image. You can also copy an HTML notation code from a website or another source and past it into the corresponding field. Any way you decide to create your color, you will notice you can read the different values for R (Red), G (Green) and B (Blue) on the right side of the sliders. You can select between two scales, one 0-255 and one 0-100. FL Studio synth adjusting knobs work with a 0-100 scale, so you have to select 0-100. Let’s suppose our color has the following values:
R= 24,6
G= 100
B= 65,1

How do we transfer these RGB values to the 3x Osc synth?
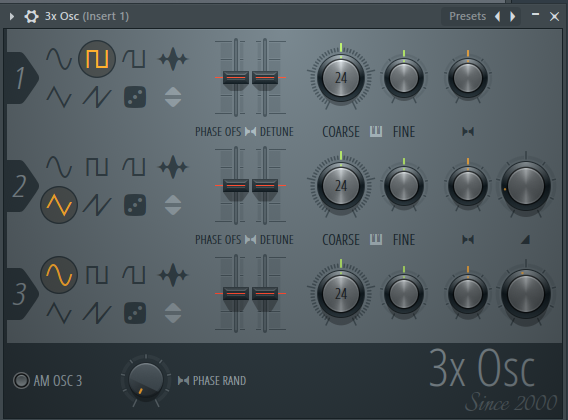
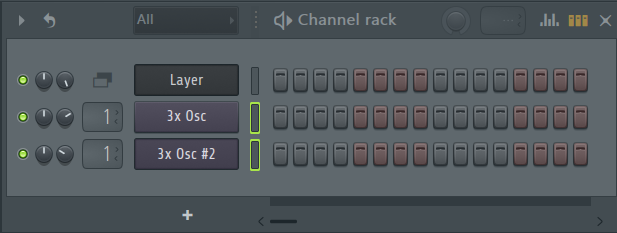
We need to know what corresponds to color channels on the synth. The answer is: the waveforms. Clicking on the plugin in the step sequencer, you will notice the synth has three oscillators and you can select the waveform for each one.
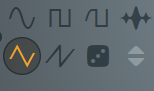
The triangle waveform corresponds to R (Red).
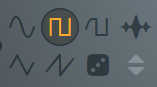
The square waveform corresponds to G (Green).
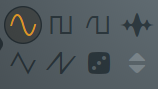
The sine waveform corresponds to B (Blue).
Starting from this basic principle, we can create any color.
Start giving all 3 oscillators the same pitch, setting the knob midway on the 24 position.
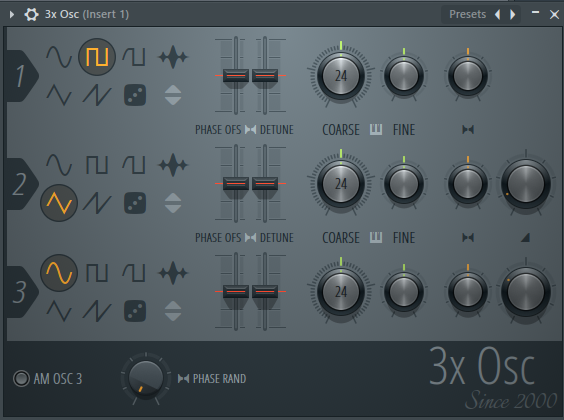
Notice the waveforms are not in RGB sequence, because the square wave (G) is first. This is for a reason. The first oscillator has no volume knob, so you have to put there the color channel with the 100 value, in this case the Green (G). But keep in mind, in order for the waveforms to mix properly, the values must be divided by half.
The other two oscillators have a volume knob, which must be set at 12 (24/2) for the second one (the triangle waveform, corresponding to Red) and 32 (65/2 without the decimals) for third one (the sine waveform, corresponding to Blue). You will notice this corresponds to the RBG values of the green hue we created in GIMP. And this will make our synth green. You can now adjust the other synth parameters such as envelopes, cutoff, resonance, phaser and any other effect you wish to apply.
But this approach only works for colors with one of the RGB channels at max value of 100. What if we want to create a shade, a darker variant of our base color?
This requires some extra work and a little calculation. Let’s suppose we want to create a darker shade of the same green color with the following values:
R= 24,6
G= 67,9
B= 65,1

In order to translate these values to volume values for each waveform on the 3x Osc synth, we must apply a formula that translates them to a 0-100 scale, which means the 67,9 Green value must become 100 and the other values must be modified proportionally. This happens through a proportion:
67,9 : 100 = 24,6 : R
67,9 : 100 = 65,1 : B
Solved this way:
100 / 67,9 * 24,6 = 36,2
100 / 67,9 * 65,1 = 95,8
So the general formula is:
Waveform volume value= 100/ (highest color value) * (lower value)
Or, written in classic school style rather than computer programming style:
Waveform volume value= 100 : (highest value) x (lower value)
This way, we have the new following values:
R = 36,2
G = 100
B = 95,8
But this is no longer the color we designed, as it’s easy to verify introducing these values in the color selector on GIMP.
How do we get the color we want?
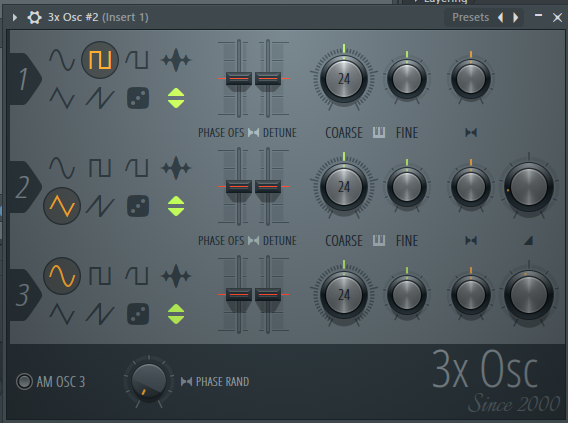
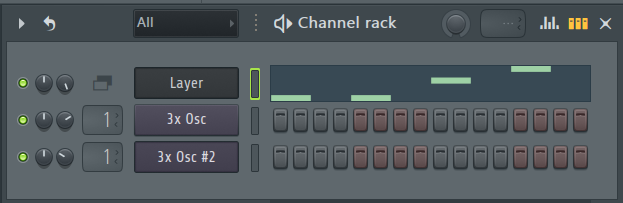
We must use another parameter in the GIMP color selector, the Value, which we can access by clicking on the HSV tab on top of the color sliders. The Value slider is the one on the bottom of the HSV (Hue, Saturation, Value) group of sliders below the RGB sliders. If we slide left to right this slider we notice the color becomes darker or lighter. For our green shade, the Value is set at 67,9. In order to translate this lightness value to our synth sound in FL Studio we must create a layer of synths. First, we create our color with these values translated to waveform values, once again divided by half, which means the triangle waveform has a value of 18 (half of R 36) and the sinewave 47 (half of B 95):
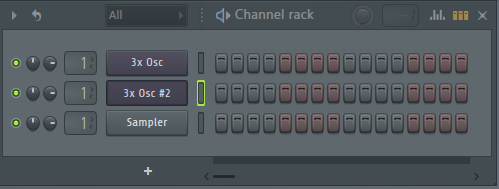
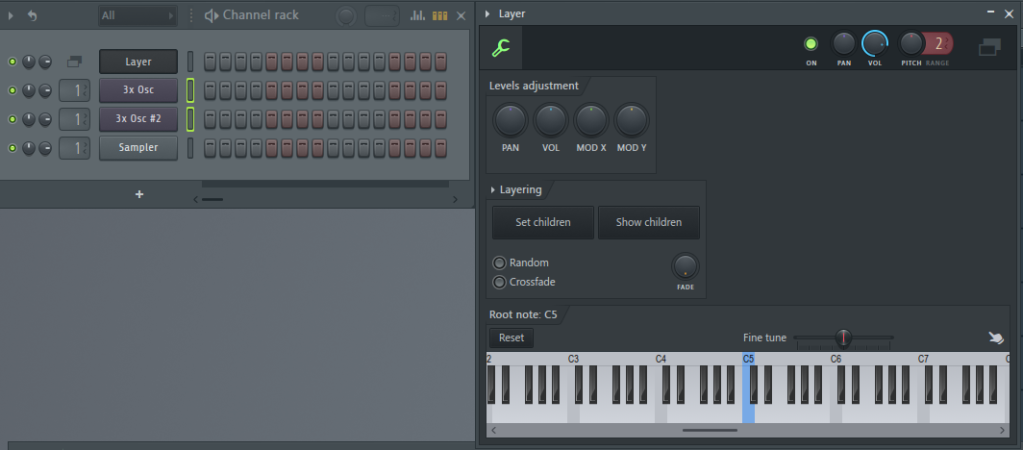
Now we must clone the plugin on the step sequencer, add a layer and set the 2 plugins as children.
Now we must use the additional plugin to create the Value parameter, which will set the color’s lightness value. Actually, because we have translated the color values proportionally to the highest value set to 100, which makes our color lighter than intended, this procedure will set the darkness value of the color. This happens by subtracting from 100 the Value parameter we can read on the GIMP color selector:
100 – 67,9 = 32,1.
Thus our darkness value will be 32. Let’s now select the clone #2 and invert polarity on all oscillators, by clicking on the polarity inversion icon.
Finally, let’s transpose this synth one octave below, by clicking on the gear, then on the clawhammer, then right clicking on the C6 note on the keyboard.

This will make our darkness value. In order to give it the 32% value we want, we must turn up the volume to 68% on the main synth, and to 32% on clone #2.
This way, when we add notes to the layer channel, through a MIDI controller or clicking on the piano roll with a pointing device, we get a pattern which plays back a synth of the green shade color we have set at the beginning of this procedure.
An alternate procedure could be setting only one oscillator on each plugin and create a layer with 6 plugins. 3 plugins for the color, 3 plugins one octave below inverted with a value corresponding to 100 – the Value parameter on the HSV GIMP sliders.
This procedure shows a basic principle which can be extended to all other synths capable of producing triangle, square and sine waves. I assume you have some knowledge of how to set an envelope, how to set any detuning, panning and other effects found on the 3x Osc or other plugins you may wish to apply. Or, anyway, that you are willing to experiment with what is visible and available on the DAW and just need this cognitive psychology information to complete your training. Keep in mind that what you get with this procedure is not the perfect aural correspondence to the color. The “color” is perceivable only as a “relative” sensation, when played in combination with synths of other colors forming a “palette”. If you design a very dark color, almost black, it will only reveal as such when played together with “lighter hues” and in form of a slight “mirror” sensation, not totally corresponding to the equivalent of the visual sensation. So these techniques work better with color ranges that lie mostly in the midrange, in other words not too extreme.
If you want to speed up this process, you can try Color To Waveform, my free and open source program to generate, from a color you choose, an oscillator waveform for the 3x Osc or another synth provided with the option of loading custom waveforms.
Click here to load the program page.
The result will be slightly different, compared to this procedure, because the program uses a 11.025Hz 8 bit WAV format, rather than the high resolution 16 or 32 bit format used by FL Studio. I plan to rewrite the code for higher resolution as soon as I can.
You can also try my 3x Osc color calculator, to calculate automatically volume values for each oscillator.
Click here to load the program page.
How about acoustic sounds?
The acoustic world tends to produce more “rounded” waveforms. Usually you don’t hear a perfectly square or triangle wave in the real world. Yet different materials produce different colors. For what concerns music production, it’s important to understand especially three:
- Wood – and most importantly paper, which is a wood derivate – produces a square-ish wave. So the output of a loudspeaker, which works with a vibrating paper membrane, produces soundwaves of a green-ish color
- Metal produces a triangle sort of soundwave. For instance, a guitar metal string will produce a red colored sound.
- Most plastics produce a sine (round) sort of soundwave. So, for instance, a guitar nylon string will produce a blue-ish sound.
So when you degrade through a loudspeaker you get an image with colors rendered in a green tint. A way to balance the tint would be degrading/mastering the sounds three times, first with the naked speaker and then with the speaker wrapped in kitchen foil and saran wrap. For a blue sound image you can also build a loudspeaker with a plastic cup, but you need a very silent setting and a very sensitive microphone to record a very low quality output, so this goes against the point of this tutorial, which is to suggest techniques to produce a track easily with consumer equipment in an urban setting.
Since we have seen that metal guitar strings produce a red sound, you understand that 1960s style amplified clean electric guitar sounds have a fluorescent pink coloration. Now, it’s common knowledge that guitar sounds transfer to the brain the ancestral image of human hair. The long-term effect on the brain of such exposure is receding hair and baldness, because when you listen to a very pleasing vocal performance accompanied by clean electric guitar sounds and you identify with the performer, in the long run your brain will tell your body to make your hair look pink, which is the color of your scalp if you are of Caucasian race (white). As a result, your hair will fall, revealing the scalp.